Monday, 29 February 2016

My Creative Scrapbook Layout

Hi All,

Today I'm sharing with you a layout made with My Creative Scrapbook Limited Edition February kit.
This kit featured Blue Fern Studio 'Blush', which are SO pretty !


                                                                              Products used
                                                               Blue Fern Studio; Blush; Charmed
                                               Blue Fern Studio; Chipboard; Bordeaux Layered Frame
                                                     Blue Fern Studios; Imagine Ink; Cotton Candy
                                                    Prima Flowers; Cigar Box Secrets; Culebra  #578640
                                                         Prima Flowers; Garden Fable; Spring # 580810
                                                                   Prima; Stencil; #564216
                                              Finnabair by Prima; Art Extravagance;  Texture paste White
                                                     Tattered Angels; Glimmer Mist; Crème de Rouge
                                                                Shimmerz; Dazzlers; Spun Sugar
                                                         Stampendous; Embossing Powder; Detail white
                                                                       Heidi Swapp; Stickers  368907
                                                         The Crafters Workshop; Stencil; Mini Harlequin
                                                        The Crafters Workshop; Stencil; Mini Tile Texture
                                                                PearlEx; Mica Powder 689 Blue Russet


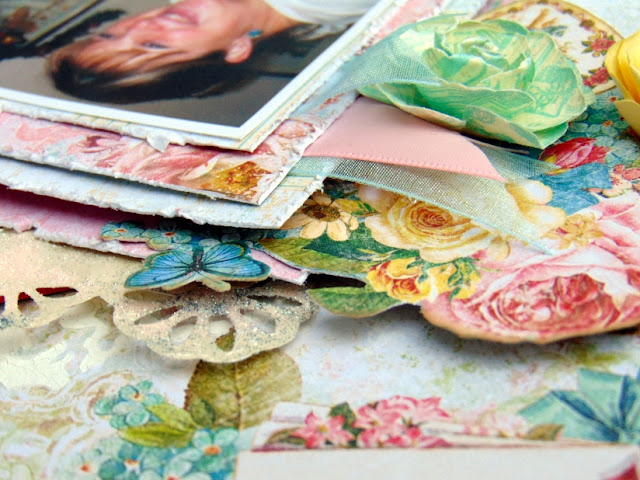
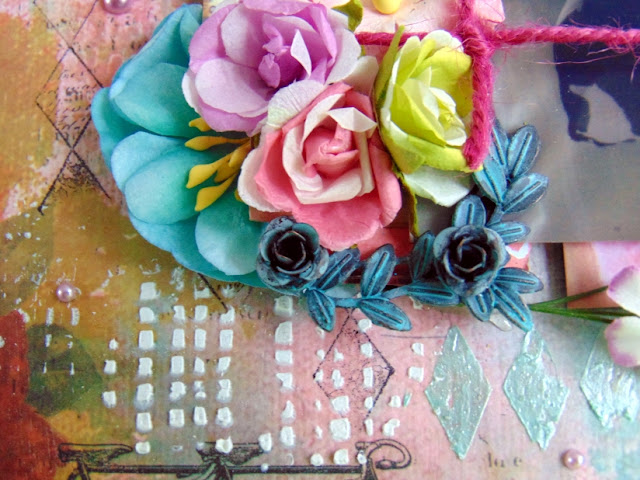
                                                       Here are some close ups to show the details.
                                                                

 I layered up the two layers of the chipboard frame with my photo backed with cardboard to give more dimension.


 I used three stencils for my mixed media background. I used a white texture paste with the Prima stencil and the TCW mini tile texture. With the TCW mini harlequin stencil I used the Shimmerz Dazzler, a very pale pink and very shimmery, very pretty. My background also had the two mists dripped and splashed over.

 The ribbon from the kit I tied into a bow and left the ends long but folded under the frame so they showed out of both the top and the bottom of the frame.


 I patched the mica powder in with the white embossing powder to give a mottled effect on the frame.


Thanks for stopping by today. Go check out http://www.mycreativescrapbook.blogspot.co.uk/  and my  http://mycreativesketches.blogspot.co.uk/

                                                                    Ginny  :)

Friday, 26 February 2016

Let's Get Sketchy February Week 4

Hi everyone !

It's time for my Let's Get Sketchy layout for February Week 4 ! Can you believe February has nearly gone already ! Next week will be March and the start of Spring here in the UK.... I can't wait for that !
Here's my layout....


                                             Here is the sketch for this weeks challenge.....


I turned the main part of the sketch around for a horizontal photo.
I have used Blue Fern Paper collection Blush for this layout from the February My Creative Scrapbook kit. This layout is full of layers....I love layers... and I have done a bit of fussy cutting, a great way to increase your embellishments !

                                                                    Products used:

                                       Blue Fern Paper  Blush: Sweetheart
                                       Blue Fern Paper Blush: Valentine Cards
                                       Blue Fern Paper Blush: Cupid's Folly
                                       Prima Flowers: Garden Fable: Spring #580810
                                       Prima: Chalk Ink Pad: Rose Bud
                                       Prima: Chalk Ink Pad: Shabby Tote
                                       Ribbon
                                       Dreamweaver Crackle Embossing paste
                                       TCW stencil: Grandma's Doily
                                       Die Cut doily using: Shimmerz Dazzlers: Spun Sugar
                                                                      : Prima: Art Ingredients: Art Sugar: light Pink
                                                                      : Prima: Art Ingredients: Art Sugar: Antique Grey

Here are some close up's.....


                                       Hope you have enjoyed looking at my layout today,
                                     Please leave comments, I love to know what you think.

                                                                     Ginny   :)


Monday, 22 February 2016

Altered Frame Wall Art

Hello again!

I had a great weekend, fab time with the kids and hubby and loads of time to do some crafty projects as all the kids activities were on hold for the week as it has been half term holidays.

I am embarrassed to say I  have had this Kaisercraft Abstract Memory frame stashed away for a couple of years and have not done anything with it ! Well no more.... I decided it was defiantly time I did something with it !  I didn't want to do a load of photos in it but instead do some kind of wall art with it to hang in my house and cheer me up when needed !

So before I go into details here is the end result.


I have used my Swirlydoos Kit club January kit - Vineyard - to decorate.

The papers in the kit were Prima Royal Menagerie and 7 Dots Studio.
90% of the embellishments are the Vineyard kit and the rest are from previous Swirlydoos kits.

As I was creating I came up with the idea of adding some of my favourite quotes which I have stamps of, so the frame cheers me up and inspires me all at the same time with Swirly happiness!

I started by painting the frame with gesso. The frame comes in two parts so you can put your papers underneath the main top part so it all looks neater.

I painted the top of the frame sitting on top of the bottom part so that I was leaving a outline of paint on the bottom part. When separated again this then acts like a template to add my papers on to.

I then planned my papers and stuck them on to my template. I was then able to glue the top part of the frame onto the base and everything looks really neat.

I painted my Blue Fern chippie with gesso first and then embossed with Vintage Champagne Wow! embossing powder. I finished off dabbing some 'Dry Sand' Prima chalk Ink pad in patches over it to 'shabby' it even more.

The Prima resins I coloured up with Mica powders and then sprinkled with Finnabair Art Sugar to add a dash of extra glitz and gorgeousness !


From this point on its just about embellishing the frame.
I stamped my quotes with Archival Ink Coffee.
The stamps are from:  Indigo Blu  :  Sheena Douglas :  7 Gypsies
My butterfly stamps are by Finnabair for Prima.


I inked the edges of the frame with Prima Chalk ink pad 'Dry Sand'.


I hope you like this frame, I can't wait to hang it on my wall !

Thanks for stopping by

Ginny    :)

Colour Board challenge

Hello all,

I am here sharing my layout for Cindy's Colour challenge over at Swirlydoos monthly kit club.
We had a mood board to follow of gorgeous colours!


We had to use 4-7 of the colours, I used 6.


The Vineyard January kit from Swirlydoos was perfect for this challenge.

The paper is Prima Royal Menagerie.

All the embellishments were from the kit except the chippies.
The chippie circle flourish around my photo and the 'snapshot' chippie word are from Dusty Attic.
I added mixed media to the layout with the use of texture paste through a mask and splattering some Cosmic Shimmer grey matt chalk paint. My papers were edged using Distress Marker pens, in some of the colours from the mood board. I also coloured the 'snapshot' with distress marker - Peacock Feathers.
The chippie circle was embossed with Stampendous vintage shabby blue embossing powder and then a distress marker pen - Peacock Feathers run over the top to deepen the colour a bit. 

The photo is one of my Cacti plants in flower last summer. I took the flower theme from the picture in the mood board. I also used Bobunny Jewels in a glass blue colour which was my idea from seeing the blue glass bottle in the mood board.


                          The flowers from the kit are all Prima in the layout, with Darice pearls.


            My layer matts that the photo is on are left over papers that matched the colour board.
                                    The edges were inked with Distress Marker pens:
                                                                 Worn Lipstick
                                                               Picked Raspberry
                                                               Peacock Feathers
                                                               Evergreen Bough


                                                         Prima chipboard elements


I used a couple of paperclips that matched the colour board.
You can see the Bobunny Jewels here to on the chippie.


The splattered Comic Shimmer grey matt chalk paint on the crackle Dreamweaver embossing paste.

I hoped you liked this layout.
Pop over to Swirlydoos to see more on Cindy's challenge

                                                                    Thanks for stopping by

                                                                                  Ginny  :)

Friday, 19 February 2016

Swirly Bliss

HI All !

Today I came home from work, half day today, and the postman had delivered my Swirlydoos Kit ! This is always extra exciting  as by the time the kit has travelled to the UK and arrived on my doorstep, all this can take up to 10days, and by then I have quite often forgotten what was in the kit from the preview, so its like opening a lovely Christmas present every month, full of surprises!!
So all plans of anything I was thinking of doing this afternoon went out of the window, everything got put on HOLD and I did some scrapping instead !!! :)

So this is what I got up to with my Swirly kit, my layout for the 'All that Flutters' challenge over on the Swirlydoos forum - go take a peek....... http://www.swirlydoos.com/forums/topic/vineyard-all-that-flutters-challenge/


In this layout I have used items from the Main kit, the Flower Add On and the Embellishment Add On.
The Papers are Prima Royal Menagerie.
The 2 Blue Fern Studio chippy pieces I embossed with a Teal glitter WOW! embossing powder and then patched over that with a pink Lindy's embossing powder.
My background I created with 2 different stencils. One with Shimmerz Textures Patina and the other one with white texture paste. I then added some stamping with a Prima stamp and black Staz-on Ink.
I love the Prima metal trinket set, I used a couple of these in this layout.
The dusty Attic 'Dreams' was from my stash, that was also embossed with the Lindy's pink embossing powder.

Here are quite a few close ups !!! I do like my close up's !!!  :)


I love all the colours in these Prima Royal Menagerie papers, so many options, I can't wait to get cracking with the next one !!!
To see more details on the Swirlydoos Vineyard  kit visit

Hope you liked my layout, thanks for visiting,

Ginny  :)


Monday, 15 February 2016

Kaisercraft February Challenge

Hello to you all,

So here is the second challenge I did this weekend, the Kaisercraft monthly challenge. This month we had a mood board to interpret. Please visit the Kaisercraft blog for more details at http://www.kaisercraft.com.au/blog/kaisercraft-february-challenge-competition/


Here is the mood board.....


Products used:

Kaisercraft: Blue Bay: Sapphire
Kaisercraft: Blue Bay: Lagoon
Kaisercraft: Key to My Heart: Devine
Kaisercraft: Storyteller: Anecdote
Kaisercraft: Time Machine: Coggler
Kaisercraft: Base Coat: Wicker
Kaisercraft: 12x12 Cork Sheet
Kaisercraft: Clear Stamp: Memory
Joy! crafts: Die; Under the Sea: 6002/0329
Marianne designs: die: LR0232
Distress Marker:  Blueprint Sketch
MemoryBox stencil: Rings & Puddles & Texture paste
Scrapberry's: Seaside: Polymer: Sea 3


Here's the close ups:


I used a mixture of papers from different Kaisercraft collections to meet the colour combo of the Mood board.


I used the Kaisercraft 12x12 Cork sheet to die cut the shell shapes and anchor.


I used the distress marker to ink my stamp and colour the edge of the background paper. Also the splats with the help of a water brush.


I used the Kaisercraft Memory cling stamp without an acrylic block to get an uneven distressed look effect from it.


All other bits and pieces were from my stash to complement the Kaisercraft products and mood board.

Hope you like my layout. Thank you for taking the time to look.

Have a lovely day.

Ginny   :)