Showing posts with label photo tutorial. Show all posts

Thursday, 13 December 2018

Noel Plaque - Tres Jolie Kits


Hello all, 

This week I'm sharing with you my project created with the December Mixed Media Kit from TRES JOLIE KITS

I loved this project and had so much fun creating it. I added a few different techniques to it.
I wanted to create a shabby/weathered look to the project.

Lets have a look!


Here is a quick photo guide on the process.....


I firstly gave the plaque a coat of the green paint.
I dried this with a heat tool to speed the process up. 
Next I covered the plaque with a thick layer of the off white paint. 
Then Dried it. 
When fully dry I rubbed over places of it with some sand paper to rub back though the layers to reveal the green paint and the wood underneath. 
I then used some crackle medium from my stash in three patches on the plaque. The crackle medium I used does takes a good 24/48 hours to crack and dry but the wait is worth it.


The 'believe' I painted with the red paint and then when dry covered in the crackle medium again. Thick in places to crack and not so in others - this is where it looks a bit white where there isn't the layer of medium to crack but I like the effect.
when dry and cracked I rubbed over the Opal Magic so that it filled the cracks. This really accentuated the cracks, I loved the way it turned out! 


I added the Opal Magic to the crackle patches on the plaque too!


Next some fussy cutting from the papers in the main Scrapbook Kit.


This was the base to main design. I used hot glue to fix one of the floral embellishments, as this a big piece to fix firmly.
I added a lovely gold mesh bow to the back of the floral piece.


The second floral embellishment piece I cut up so I could create a smaller cluster....


…..And made this arrangement on the opposite side of the 'believe'.


I added the fake snow around the floral cluster by dropping it into wet glue and leaving it to dry and then shaking the excess off after when dry.
I finished off by rubbing some Viva Ink Gold around the edges of the 'believe' and the outside edges of the plaque and dropping some of the glitter on to the background that had fell off the floral embellishments..... I never waste anything!!! 


Here are some close ups of the finished project.


PRODUCTS IN MIXED MEDIA KIT


Prima – Impasto Paint Poppy Red
Prima – Impasto Paint Bottle Green
Prima – Impasto Paint Linen
Prima – Art sugar Antique Silver
Prima – Opal Magic Wax Vintage Silk
Darice – 8” Poinsettia Pick
Darice – Woodword Script  Believe 9.5”
Darice – Pallet Wood Sign 10.5 x 10”
Kaisercraft Mini Stencil - Holly


If you are interested in this Card Tags and More Kit or the other two kits available from Tres Jolie kits then please look HERE


Tres Jolie Kits can be found in the following Social Media sites


Happy  Scrapping!

Ginny


Friday, 16 November 2018

Shabby Chic Greetings Cards...

Hello all, 

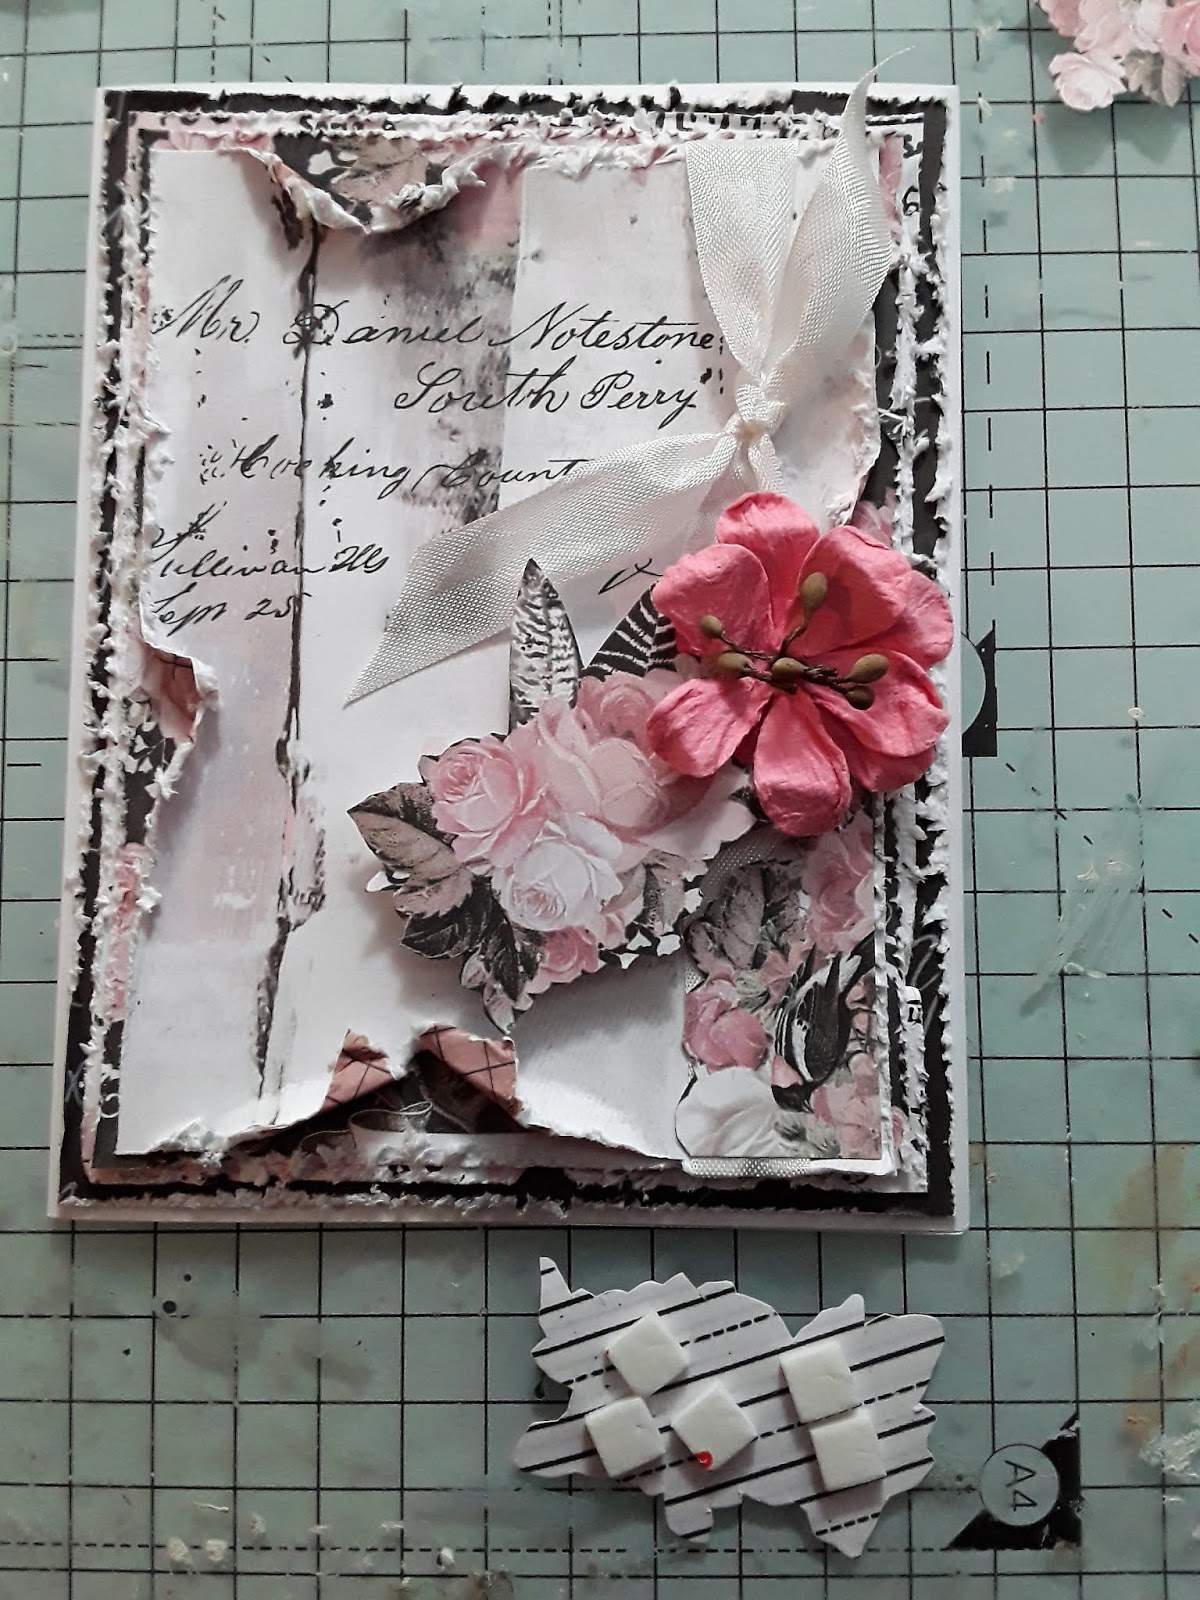
This month I had the card kit from Tres Jolie Kits to play with.... I am not a regular card maker but I have to say I really enjoyed creating these!
I have made two sets of cards, the second I will show you later in the month.
The card kit features Prima Amelia Rose, beautiful papers, with embellishments from Prima, 49 & Market, Darice and Creative Embellishments.

Here are some photos of the cards


Now I will show a step by step process for creating them.


Use the white blank cards from the Card kit...…


I chose 4 different patterned papers from the Amelia Rose paper pad. 
I trimmed the first paper to fit the front of the card making it very slightly smaller then the card size.


Each paper layer after that I made lightly  smaller then the previous to create the different layers.


I distressed all the edges and the final layer I tore into to really distress it!


Stick the first two layers onto the front of the card


And the third....


The fourth layer I wrapped the seam binding around it length ways and tied into a bow...….


….and then glue it on top of the other layers.


I wanted to create a  decoupage effect with some fussy cutting from the papers. I cut four pieces of similar  flower clusters from the floral paper.


With my starting point in place with my chosen main flower I then started adding my decoupage layers next to it, with the use of tiny small foam pads.


If you are layering up amongst flowers you may need to double pads up at one end to get the piece to sit flat. 


I then added the next decoupage layer in order of size on top of the first.....


I added a third layer.....


At this point I also started to add more small flowers and the leaves.


The last paper decoupage layer was added...


...along with another small flower and leaf.


I added  a couple of single fussy cut flowers to the background before adding my title greeting.


The chipboard titles were embossed with white embossing powder.


Here are the products used on these cards

* Prima Amelia Rose A4 paper pad
* 49 & Market Garden Seeds Watermelon
* Creative embellishments chipboard - Sentimental Words
* Darice Cards & Envelopes
* Tres Jolie Seam Binding


And some close ups...…


To purchase this kit or subscription to Tres Jolie Kits click HERE


Tres Jolie Kits can be found in the following Social Media sites


Thanks for stopping by today

Happy scrapping

Ginny   :)


Thursday, 4 October 2018

Best Memories - October Kit - Tres Jolie

 Hi all, 

Its the start of the month with a brand new kit to share with you from Tres Jolie Kits.

This one was gorgeous and I thoroughly enjoyed creating with the gorgeous 13 Arts papers.

The colours were vibrant in places and as you will see later tin the month I have done a masculine layout from the kit too.

Here is my first layout for the month and it is also my interpretation of the sketch. It is, I admit, quite a loose interpretation but this is where I ended up in my process of following it! 
I hope you like it!


Here is this months challenge sketch.


The next few photos show you my process in creating this layout.


I loved this patterned paper with the black background and was my first choice of paper to use from the kit. 
I also chose the frame from the embellishments to match to the sketch design.


These are the flowers and chippy pieces I chose to use from the kit. 
I have added some other flowers from my stash to create the flower overload that we all love!


I mixed some pink acrylic pink in with the texture paste to create my pink texture paste 


I used this pink paste to stencil my background 


My chosen photo I slipped inside the frame 


I used the pink texture paste on the chipboard swirls as well. I built it up in places to create a think layer very textured layer.


The title chipboard I covered with a white embossing powder


I also added some white texture paste stencilling on the background


The photo and frame are popped up on cardboard so I could add flowers underneath the layers which creates depth and makes the layers stand out more. I built the flower layers up with the pink chippy swirls layered up with them.


Lastly I added the title chipboard pieces gluing them on top of the flowers.


Here are some close ups of the layout


For details on subscribing to these monthly kits follow the link below.


Here is the September Scrapbook Kit I used to create this layout


Don't forget that Tres Jolie can be found in the following places:


Tres jolie website: http://tresjoliekits.com/


Tres jolie subscriptions: http://tresjoliekits.com/services/


You Tube 


thanks for stopping by today, 

happy scrapping! 


Ginny :)