Monday, 19 May 2014

So Happy Together

What a gorgeous sunny and hot weekend we have just had. Quality time spent in the garden with the kids and a little bit of crafting time too!!
Today i'm showing you a layout that the theme was 'masking', so here's my LO.


I used a hexagon, 'That special Touch' Mask at the top to match the patterned paper in the middle and another 'That special Touch' mask, dripping dots, as I call it! Through these I used a Pan Pastel 'burnt sienna'.  My background paper was an American Crafts; Dear Lizzy 5th & Frolic. Other papers used were Echo Park; Here and Now:  My Minds Eye; collectable 'Memorable' and 'Unforgettable' paper; Panduro; Letter from Old Days.


I used Tattered Lace dies 'Lacy Daisies' and Sissix dies decorative borders and tags. Pins and button embellishments from My Minds Eye.  The stamp was a MME doily stamp, stamped in Distress Ink Black soot.

 
I cut up the MME collectable memorable papers for my journaling words and the chalkboard tag was from Prima " The Optimist" collection "perfect" paper. 

 
I distresses some paper and inked all but the chalk board one with Distress Ink Frayed Burlap.
 
 
Lastly a lovely Martha Stewart deep edge punch, Baker's twine and Liquid Pearls; platinum pearl.
Thank you for popping by.
 

Saturday, 10 May 2014

Scrap365 May sketch challenge

                                              Its sketch challenge time again for Scrap365!


I flipped the may sketch 90 degree's, so my long oblong (green) is now vertical.
I used a Authentique Paper for my background, Blissful "pleasant".
The other papers were Simple Stories Awesome Me.


I did a lot of random stamping on this layout, with Coffee Archival ink and 3 of my favourite stamps at the moment, Indigo Blu 'script'; Kaisercraft 'hessian'; Finnebair 'brickwork'.

 
I also used some watered down gesso brushed over in patches and then masked with texture paste with a dotty 'That special touch' mask, layered with the stamping and odd thicker brush strokes of gesso and then dropped mica flakes into the texture paste whilst still wet.

 
The chippy is from Echo Park 'This and That' and the alpha's and 'awesome' word from simple stories 'Awesome me' sticker sheet. Inks used; distress ink 'vintge photo' and 'ripe persimmon'.
 
   Happy Scrapping!!!

Friday, 9 May 2014

My Winkles

 
This layout is one of my favourites, I love this fun photo of my children. 


This is made from a monthly scrapbook kit from Funky Farm Scrapbook Barn from last year. It uses papers from Glitz Designs, Hello Friend range. The design was my take of a sketch challenge for Scrap365 magazine last year.


I used Kaisercraft wood flourishes and birdcage, that have been embossed with powder and then patchily inked over the top.


Lots of Prima products as well, beautiful Tatiana flowers, bling - corners and frames and alphas. Other products used Liquid Pearls; Bisque, coloured cardstock and various ribbons from the kit, Adirondack ink; sandal.
Its nice to take a look back at some older layouts to remember those moments, after all that's why we are making them!!
 

Our walk by the Estuary

Good afternoon all! I said on a previous post that I would be using some photo's from our walk along the Pembrokeshire estuary banks and here's one of my favourites.
 
I knew as soon as I saw this photo that I wanted to use the sweatshirt colour as my main colour to highlight and then keep it fairly neutral after that. I love chalkboard and thought these tags fitted in well.
 

The gorgeous background paper is from a lovely collection of background 12x12 paper pad by Santoro called 'Mergirl', they are beautiful!! And coloured cardstock in pale blue, orange, beige and black with a Tonic border punch Strip. 
The chalkboard tags are My Minds Eye Chalk studio decorative tags. I used the lovely flourish from Tattered Lace, the alpha's are Kaisercraft mini alphas stickers and the words are Authentique Diction.


I really like using masks at the moment. Here I have used  a 'that special touch' mask with a Pan Pastel '22803 Orange shade', which matched the sweatshirt colour beautifully. The bird die is from The Memory Box, and the chipboard elements are from My Minds Eye.

 
I was really pleased with the flowers, which I made myself from a Woodware flower punch, lots of layers to create a good 'double' flower and inked the edges with Distress Ink Walnut Stain. And Teresa Collins enamble dots.
 
Hope you like it too!

Tuesday, 6 May 2014

Home sweet home printer's tray

Hello, time to show you what I've been doing over the weekend! A little project done for a Swirlydoo's challenge, this is a Tando Creative mini printer's tray with the theme:- my home. After assembling the tray I painted it with gesso and then stamped over frame with two stamps and embossing powders. (I used hessian and script stamps) Then after choosing photo's and cutting to size for the boxes I'd chosen, decorated the others with little bibs and bobs. I added lace and die cut flourishes, birds and ivy and a stamped title.
 

Wednesday, 30 April 2014

Kaisercraft Drawers

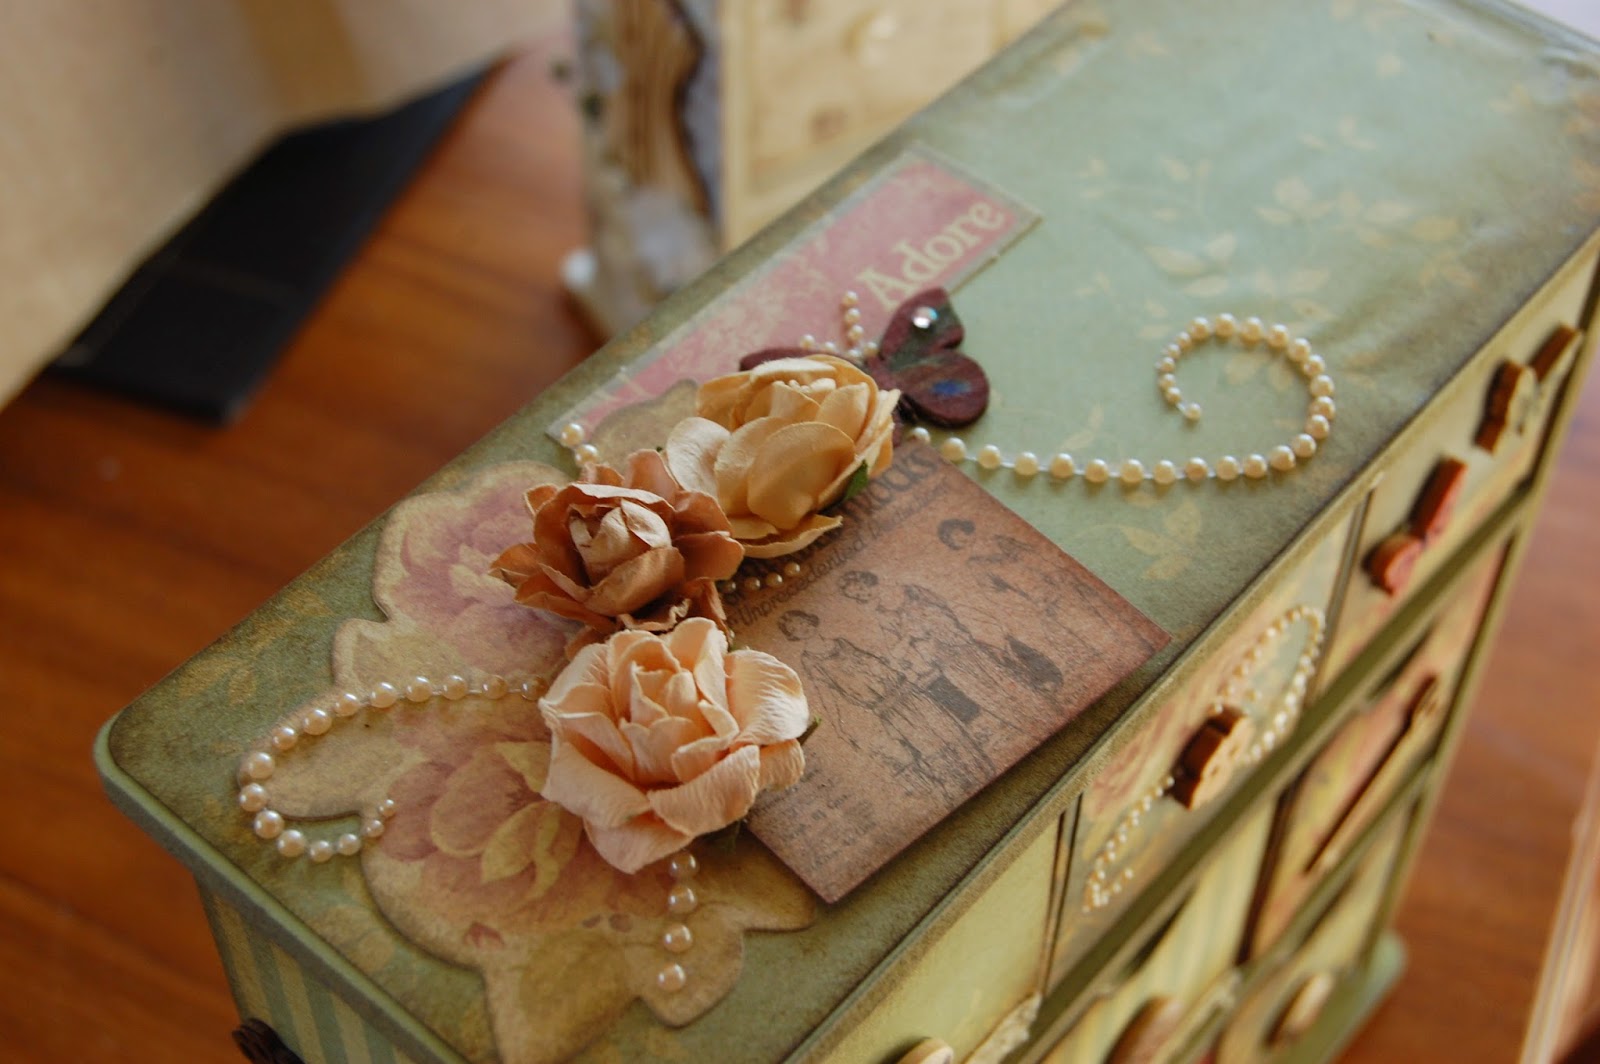
I also wanted to share with you today my favourite, Kaisercraft drawer units :) I have created a few of these now too! I love them and made using the kaisercraft paper collections they just look fab!

This set is the medium drawers, with 9 drawers,  really nice size to make a lovely feature but useful for storage too. I have my small bits and pieces in mine so I don't loose them! The paper collection is my favourite Kaisercraft one - Magnolia Grove.

The unit once put together was painted in Kaisercraft sage green acrylic paint, before being covered in the papers and then inked up with Distress Ink 'frayed burlap' to vintage it! Ive used a Kaisercraft wood flourishes 'Mannequin', just inked up a little.

The collectables that come with each kaisercraft collection are really handy to use as decorations as I have here, layered up with pearl flourishes and paper roses. 

I then use any kind of small embellishment to decorate the front but they also double up as handles. Buttons are good but find wood embellishments work well too.

Lace and bling add another little feature.

And the hinges - love those, also from Kaisercraft. Key hole wood embellishments look good too, although haven't used them on this one. Use foam pads to layers up, especially on the top, to make a real feature. Hope you like these as much as I do!

A pretty frame

Happy Wednesday to you ! Today I wanted to show you some off the page altered art. I made one of these frames for myself when 'playing' with ideas and loved how it turned out. I'm a 'everything white' kind of person, very shabby chic and pretty and romantic and these frames reflect that. My friends and family saw this frame and since then I have made loads of them for them and for gifts that they wanted to give to other people.
They start of as a normal plain pine frame, then covered in gesso. Two coats is sometimes needed. A tissue stamping technique is then used with Indigo Blu 'slap it on'. Stamp image, I used an Indigo Blu stamp, onto mansize tissues with a pigment ink, I used Brilliance pearlescent range in two colours that complement each other. when dry cut out image neatly and as close to edge as possible but without cutting into edge of stamping, then separate tissue to one layer and using 'Slap it on'  with a paint brush coat the frame where u re putting your image with a thin layer, lay tissue on top and then paint a further layer of 'slap it on' over the top, to seal, being careful not to brush over it for to long as you will ruin the tissue if too wet or if rubbed to hard for too long. Continue to cover over your frame in this way until you have gone all the way round it. Leave to dry, I normally leave over night. This a good technique to go over or round corners, if your frame has a ridge like mine, as the tissue folds and stick around these.                                                                                                                            

Then you are ready to decorate. There are so many different ways to do this, and so many products that could be used. I used my favourite flowers on this one, Prima Tatiana, that come in various colours, a doily, lace around the aperture, a flourish die, mine is a cheerie lyn, Prima butterflies, Prima songbird flowers, Sissix banner die, peg, and tiny mulberry rosebuds.  
 
I like words or verses on them too, this one has just a couple words on the sissix banner die cut, inked round the edge with distress ink 'frayed burlap'.
 

I usually decorate 3 out of four corners with one being more prominent then the others.
Try making these  to match your colour scheme in your house or of a wedding for a lovely gift.
I do these to order for any occasion or colour scheme, having done birthday's wedding's, anniversaries, mother's day and have personalised them to suit. 
Have a lovely rest of the day!!