Showing posts with label Graphic 45. Show all posts

Wednesday, 15 November 2017

CSI - Case File 242!

Hey folks!

Its time for another case file already!

 Here we are with CSI - Color Stories Inspiration Case File #242
So, are you ready for the new challenge? Grab you forensics kits, CSI players, and get ready for some serious sleuthing.


Here is how I solved the case!


Here is CASE FILE #242


All colours used from the colour scheme

My Evidence used was:

* test pattern  (text paper on background paper)
* texture paper (torn paper)
* leaves/ branches/flowers
* ruler/ tape measure (tape measure ribbon)
* Ribbon (brown organza ribbon)

My Testimony used was:

* Document something you love to do
* Inspirational words - thank, hello, think


Here are some close ups and details:


My layout is a selfie photo of me, my mum and my daughter, 3 generations all saying hello!
We were walking my dog, one of my favourite things I love doing. Its so colourful at the moment with all the autumn colours , and the crisp air of this time of year is another favourite.
My journaling is, as with many of my layouts, written on the back of the layout.


I used a Graphic 45 paper which was perfect for setting the seen of the leafy background behind us. It matched the photo colours really well and worked with the brown text background paper. I tore my edges for the textured look and because I hate straight edges! 
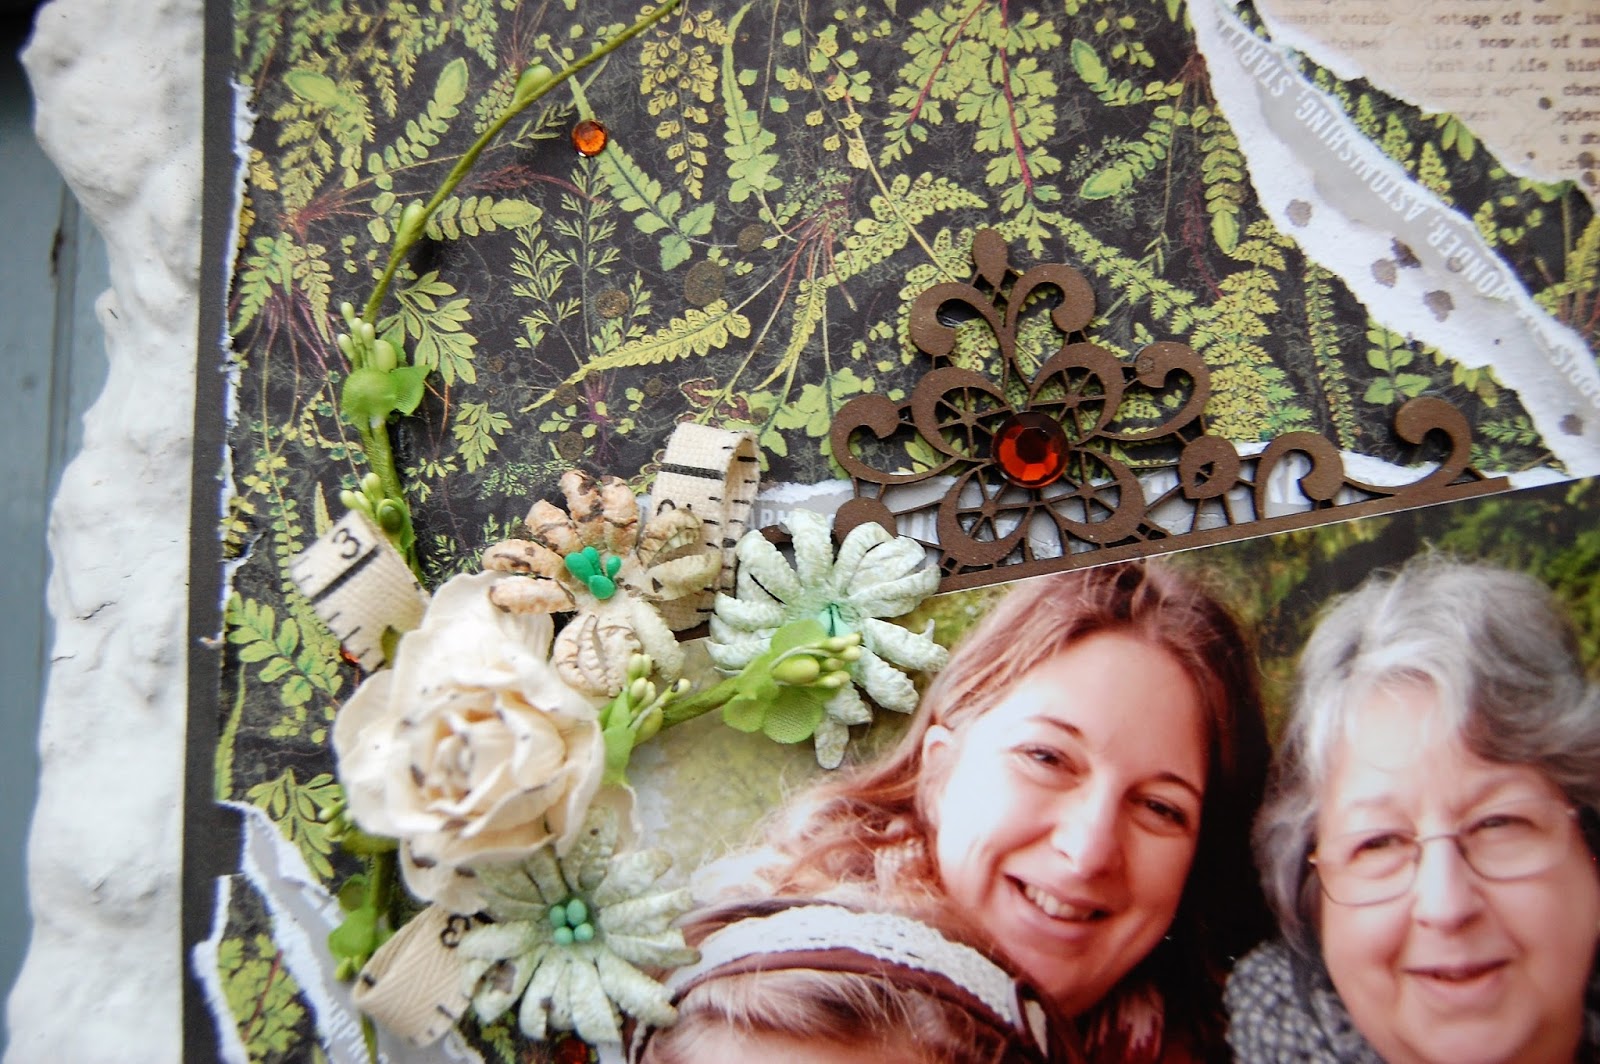


My chipboard pieces were simply coloured with Walnut Stain Distress Ink Stain to darken them. 
and then decorated with gems.


The loved the tape measure ribbon poking out from the flower clusters alongside the brown organizer ribbon for contrast. I have used some Prima Color Bloom mist Antique Gold splattered on the background.


SPONSORS We're so excited to have eight generous sponsors this month! Our sponsors are among the best in the crafting industry, offering unique and trendy products.


We trust we've left enough clues for you to solve the case!
The deadline for completing this Case File is Thursday, November 30, at 11:59 p.m. EST. Be sure to link your layout using the link tool in the sidebar on the CSI blog, and mention the Evidence and Testimony clues you used. Also, please title your link with your name and country.


CSI BLOG HERE


Thank you for stopping by my blog today, 


Ginny


Friday, 12 May 2017

Altered Shadow Box with Graphic 45

Hello all,


Today I'm sharing an altered art project with you all!

I have used a Shadowbox kit from Clare Charvill at My Creative Spirit
and altered it using Graphic 45 paper collection Raining Cats & Dogs.


After assembling the shadow box I painted it with some black acrylic paint, all over, inside and out.


When it was dry I rubbed Viva Inka Gold with my finger along all the edges, not neatly, I wanted it to have a shabby distressed antique look about it.


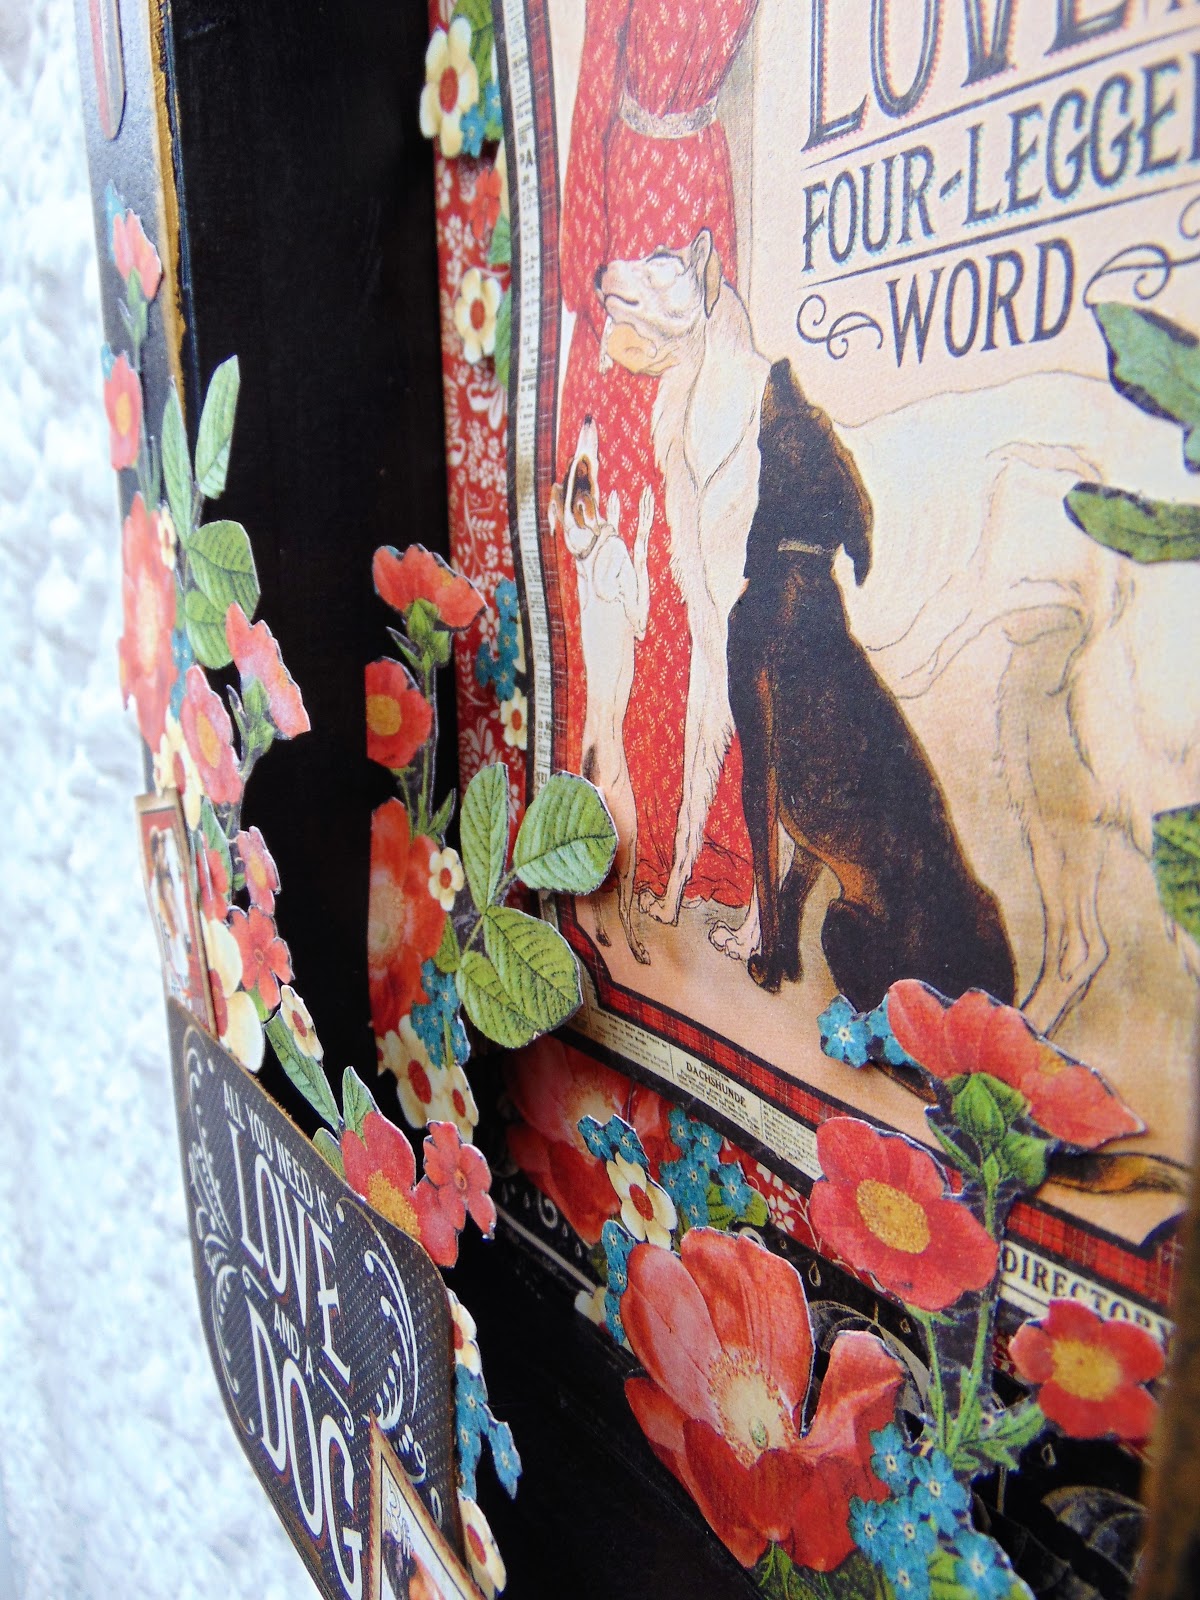
I started with the inside back of the box. I Covered this area with my choice of background paper and a couple of strips of a pattern border at the bottom and top. My main feature postcard the 'love is a 4 legged word' I popped up on foam pads and stuck to the back.


Then came loads and loads of fussy cutting! There is a beautiful paper in this collection which is full overload of flowers and leaves, I cut out the whole lot from the 12x12 paper!
All these fussy cut pieces I have added to the box gradually increasing the depth of the foam pads (some pads cut up so small to fit the small cut pieces) to create the 3d effect. I built the flowers up from the bottom to create the garden effect. I slipped some under the edge of the feature postcard and a little on top left edge.


On the outside front of the box my design was based around the red 'Home is where my dog is' banner at the top and the 'All you need is love and a dog' in the bottom left hand corner. These were stuck straight onto the box with a few fussy cut flowers slipped underneath and a fussy cut stamp added on top. I then glued fussy cut flowers around the top front edge and  glued some underneath the lip of the top front so they look like they are growing out from inside the box.


By gluing the fussy cut flowers so they overlap all the edges softens the look and adds to the 3d effect. It really makes you feel like you want to peer inside around the foliage to see what else is in there!


Products used on this project.

Clare Charvill 'My Creative Spirit': Shadowbox kit
Graphic 45: Raining Cats & Dogs: 12 x12 paper pad
Black acrylic paint
Viva: Inka Gold: Old Gold
Glue and foam pads


Thanks for stopping by today.

I hope you liked this project!


Ginny  :)


Sunday, 19 March 2017

** March Round Robin Challenge at Swirlydoos**

Hello again!


I seem to be having a little flurry of blog posts in the last 48 hours!

Todays is my layout created for the Swirlydoos March Round Robin Challenge.

This is  fun monthly team challenge of 3/4 players in a team and usually 3/4 teams play every month, and the idea is to 'lift' the layout from the previous person on your team. 

I am on Team 1 and doing Week 2 following teammate Sherri.

So the theme this month was 'Going Green'. We had to use the colour green in our layout somewhere, use green foliage and 'be green' by using a recycled something on your layout and to use a an outdoor photo.


And here it is .....


Here are some close ups.


I did a lot of fussy cutting from these A Ladies Diary papers and then layered them up with foam pads to create that 3d effect backed with the cheesecloth. The Wycinanka title was painted with gesso.


My recycled items were the sparkly strand material that was decorating an Bath Fizz Ball at Christmas! This changes light in different lights and has a green look to it. My other recycled piece was the rose flower cluster with bow that came of a card I received a long time ago!


I followed the flow of these lines from Sherri's layout (she used a leaf garland) and made my pearl heart with Nuvo Crystal drops.


Sherri had used paper weaving on her layout so I did mine slightly differently by using chequers from the Ladies Diary papers creating a similar look to keep the theme going. All my edges were distressed with my trusty Prima distress tool.


Some of the fussy cutting was quite intricate but well worth the effort.


Product used on this layout

Graphic 45: A Ladies Diary 12x12 deluxe collection
* Delicate Details x2
* A moment in time
* Timeless Memoir
* Picture Perfect

Nuvo Crystal Drops: white
Wycinanka: Remember
Scrapberry's: Wind of Travel metals
gesso
cheesecloth
Recycled items


If you interested to see rest of the layout from the teams then pop over to the Swirlydoos forum here


Thank you for popping by today

Come back soon!


Ginny  :)    💕


Friday, 23 September 2016

School Days **CSI color Stories Inspiration Case File 213**

Hi crafters!

Today is reveal day of the next CSI Case File Scrapbook challenge at CSI- Color Stories Inspiration. Case File 213 is open until the 14th October 2016.

To get you straight into some inspiration here is my 'solving' of this case file!


And here is the case file

---------------------------------

Here are the EVIDENCE clues I used;

* Grid pattern/ mesh
* numbers/ maths symbols
* flowers, leaves
* ruler/ tape measure


Here is the TESTIMONY I used;

* Document something about school

---------------------------------


Here are some close ups.


You can see the stamping here. I used the orange from the colour scheme to stamp the grid stamp and a Distress Ink Black Soot to stamp the drawing pin.
I did lots of fussy cutting from the Graphic 45 papers.


I used the Nuvo Crystal Drops to colour the numbers on the Wycinanka Die cut.


Layers of pieces cut from the Graphic 45 papers.


Product used on this layout were;

Papers;  GRAPHIC 45; ABC Primer; Games & Playtime
          GRAPHIC 45; ABC Primer; Bedtime Stories
         GRAPHIC 45; ABC Primer; School Days
          GRAPHIC 45; ABC Primer; Building Blocks
         GRAPHIC 45; ABC Primer; AN ABC  Primer
       Coredinations; Foundations Cardstock; Canvas Texture

Other;

Wycinanka Die Cut piece; BG Numbers
Prima Marketing; Cling Stamps; Sunrise Sunset
Blue Fern Studios; Attic Charm; Glitter roses
Anna Marie Designs; Dried Flowers
Prima Marketing; Flowers; Garden Fable; Spring
In House Crafts; Miniature Sweetheart blooms
Live & Love Crafts; Yellow roses
Nuvo; Crystal Drops; Wedgewood Blue
GRAPHIC 45; ABC Prima; Chipboard Pieces
Prima Marketing; Chalk Pad; Rusty Keys
Tim Holtz; Distress Ink; Black Soot


If this has made you feel like you might like to join in with this challenge please come over to the CSI forums and take a look around and when you have completed your layout add it to the gallery. As always there are some amazing prizes to be won from these fabulous companies!


Happy Case Solving Crafters!!

Ginny  :)


Wednesday, 21 September 2016

Mermaid Chest with Graphic 45

.Hello All,

Today I'm sharing a little project that I was 'playing' with over the weekend!

I bought this little Paper Mache chest from In House Crafts in Milford Haven and decided to alter it with Graphic 45 Voyage Beneath the Sea paper collection.

My aim was to create a 3d scene within the chest of an underwater scene all created by fussy cutting the Graphic 45 papers, all revolving around the beautiful Mermaid.

Here she is......


The Paper Mache chest I painted in Verday Bronze paint and altered it with the Verday Patina solution to give it a corroded metal feel. This Verday Paint Kit came as the Technique kit in my Swirlydoos kit in August. It is fantastic stuff, I Love it!


I did LOADS of fussy cutting from the Voyage Beneath the Sea Papers. All edges were inked with Distress Ink Frayed Burlap.
Obviously I cut the Mermaid, the diver and a seahorse but also loads of starfish, seaweed and plants and a shell. Its a little time consuming but I do find it relaxing to snip away whilst watching something on the TV!


I used a Silky Crush ribbon in parrot green, Webbed Weave in Olive and  lime green Burlap to mimic seaweed and plants and to help fill out the chest.


I placed a concertina folded paper in the base of my chest to give me places to fix different elements to at different  depths with in the chest. I decorated the outside and layered up pieces as well to keep creating the 3d effect even on the outside. I used my glue gun for most of the gluing, its easy to add a good 'gloop' of glue to make an element stand up 'off' from the layer underneath.


I finished off by using a Nuvo Crystal Drops to add a little sparkle to all the teal coloured pieces and the Mermaids Tail.

Thanks for stopping by

Ginny  :)


Tuesday, 16 August 2016

Altered Mini Gift Caddy

Hey everyone!

I fancied a little change from Scrapbooking so decided to do an OTP ( Off the Page) project.

I have had this chipboard kit, Mini Gift Caddy, waiting to be put together from when  I purchased it from a Clare Charvill Workshop back in April. I was so inspired by her creations, I came home with several of Clare's Chipboard kits to alter. Her kits come under the her own branding 'My Creative Spirit' and can be found here; http://www.mycreativespirit.co.uk/


I made the Gift Tray with the instructions provided via a web link.  It was very easy to make. I used Clare's black tape that she uses to assemble it with. This also then gives a nice black finish to the edges. Any other edges left bare I ran a black ProMarker along to make them black.
The papers I used to cover it with were Graphic 45 Voyage Beneath the Sea.
I edged the papers with Distress Ink Pad Black Soot.


I used the Chipboard pieces from the Voyage Beneath the Sea Chipboard collection to embellish it.


I kept the inside all one style of paper


This is the back view.


This is the front view. I used some ribbons and sprays from my stash to decorate the chipboard tags. I thought the greens looked a bit like seaweed!


I inked around the edge of this chipboard on the front of the caddy and added the Prima orange flower centres.


I hope you enjoyed looking at this project,

Happy crafting!


Ginny  :)


Wednesday, 13 April 2016

A 2 day workshp with Clare Charvill

Hi all,

I had an amazing time last week at a 2 day Clare Charvill Workshop at In house Interiors and Crafts in Milford Haven, Pembrokeshire, Wales featuring Graphic 45 papers, Communique.
We made a Mini Album in a Box, a product from Clare Charvill's 'My Creative Spirit' papercraft designs range. It was a wonderful 2 days with a group of lovely ladies and Clare's excellent guidance and tuition.
Here are some photos of the box and mini album after I had finished putting the last pages together when I got home!


I am raring to go with the next project now!

Thank you for stopping by

Ginny