Showing posts with label More Than words. Show all posts

Tuesday, 27 June 2017

Steampunk and Fathers


The challenge for this months More Than Words challenge was  a 'challenging' one for a floral shabby chic girl like me!
The theme and word this month is Steampunk and Father.


The 'Father' part was easy. I chose this photo of me with my father on the Scotland / England border at Carter Bar.
The colours in the photo were then my inspiration for the steampunk mixed media masculine background.


With these pictures I will just show you some close ups of the items used in the layout.
These blue and grey cogs are a die set from a Joy! Crafts. I inked the edges with Black soot Distress Ink and finished of with a Tim Holtz Loop Pin.The anchor is from Blue Fern Studios and was firstly covered with Viva Inka Gold.


The Dusty Attic barbed wire was altered with Ten Seconds Verday Patina solution with the Verday Iron. This gives a great rusty look about the chipboard. I love these Tim Holtz trinket pins, this one has reacted to the mists I have used to create the colour reaction on it.  
Tucked behind the top of my photo and its layers is my journaling card.


The Dusty Attic chipboard cogs and gears cluster was covered with 2 products, some of the cogs had black soot ink rubbed over them and some had the Viva Inka Gold 'Old Gold'. The later gave the pieces a gorgeous golden metal look about them but was just to clean and new looking, they needed 'weathering'! This will be down to the mists again but I will tell you about those in a minute.


I used some chain from my stash to wrap around the top of the chippie chain. The Game spinner is again  from Tim Holtz.


The Blue Fern Studio chains were also altered with the Verday products.
The Tando Creative key was covered with the Viva Inka Gold.


I used a shaped torn piece of corrugated card in my background behind the photo , a great product for masculine layouts, it adds a great texture. I inked the edges again with the black soot ink.


I left the use of the mists till now......  the background paper is from 7 dots studio and I gave it a coat of clear gesso before the start to prepare it for all the misting.  I spritzed the design area with several different mists using colours taken from the photo, from the blues/green from the mountains behind to the rust colour in my coat. I let these mists run by tilting the paper and then dried with a heat gun after each colour application. I have listed them all in the products list but the main ones to mention here are the Cosmic shimmer mists, 'rich gold', which gave the orange rusty effect and then the 'Blue Lime', this is a fabulous product, it is essentially green but when sprayed onto certain surfaces reacts and turns to an electric blue colour! This mist reacted on the Verday and the Viva Inka Gold and on some of the other mists giving the whole piece a very natural weathered look that I couldn't have planned! I splattered these 2 mists over the completed layout again at the end.


I then finished off the by rubbing some French sage Artisan Powder over the edges of the photo layers, chipboard pieces and the paper die cuts.


The alpha tiles were cut out from a 7 Dots Studio paper, edges distressed and then stuck on with foam pads. You can also see the small bits of stamping done with black soot ink and the Finnabair Crackle effect stamp underneath the title. This was done over the design area before the misting.


Products used on this layout:


7 Dots Studio; Destination Unknown: under the stars
7 Dots Studio: destination Unknown: night sky
7 Dots Studio; Thoughts Keeper: No.3
Cosmic Shimmer Mist; rich Gold
Cosmic Shimmer Mist: Blue Lime
Prima Color Bloom: Tea Stain
Prima Color Bloom: Antique Gold
Perfect Pearls Mist: Blue Smoke
Prima Memory Hardware: Artisan Powder: French Sage
Tim Holtz: Idea-ology: Loop Pins
Tim Holtz: Idea-ology: Trinket Pins
Tim Holtz: Idea-ology: Game Spinners
Tim Holtz Distress Ink: Black Soot
Maya Road: Vintage Findings: Time Flies metal Charms
Chain
Joy! Crafts: Die: gears
Joy! Crafts: Corrugated card
Dusty Attic: chipboard: Birds on Barb Wire
Dusty Attic: chipboard: Cog Cluster
Blue fern Studio: chipboard: Anchors Away
Tando Creative: chipboard: Decorative Keys
Prima Finnabair: Small Clear stamp: Crackle
Ten Seconds: Verday Patina Solution
Ten Seconds: Verday Iron
Viva: Inka Gold; Old Gold
Clear gesso.


Thank you for stopping by today


Ginny  :)


Wednesday, 10 May 2017

May Challenge Entries

Good evening all!


I so enjoyed doing my layout for the More than Words challenge last month I decided to enter this months challenge as well!
And this one is so up my street, the word inspiration is 'Mother' and then the theme is Flowers! What could be more perfect then that for a flower loving girl like me?!

I have also teamed this layout up with the Scrap The Girls Challenge also with the theme 'Mothers'.


Here's my layout


Here is the MTW challenge and link to the challenge post HERE


Here is the STG challenge and link to the challenge post HERE


Now for a little info on my creating!

My photo is of my Mum ❤ She is pictured here visiting a beautiful garden over the winter with the most amazing backdrop of plants and flowers. I rummaged through my patterned papers for the right papers and found these perfect papers from Kaisercraft called Treasured Moments. The forest green and deep raspberry colours matched the background colours of the photo so well.

Obviously it had to be flower overload, I have created this effect with fussy cut flowers and a selection of flowers from Wild Orchid crafts.
After that I had a bit of fun with some mixed media!


This Dusty Attic Chipboard flourish is two pieces layered up and then embossed with the magenta embossing powder. This powder is lovely, it has glitter pieces in it so is really sparkly but also when its heated bits of it go slightly white which gives a lovely effect. I have noticed this with other colours from the range, not sure if it happens from over heating or is meant to happen but either way I love it!  


The other piece of chipboard, the doily, I embossed most of it again with the magenta but left alternate parts of the pattern bare so when the chippie had been finished heat embossed and cooled I could glue the bare parts and add the Army Green glitter. The doily I then cut in half and used in two places on my layout. 


My edges were all distressed with my Prima distress tool.
I used two types of flowers from Wild Orchid crafts, these are paper flowers, the small Gypsophila comes in several different colours and these two pinky ones matched perfectly with my layout.


I spent a long tie fussy cutting the flowers, a little time consuming but worth it. I gives a great backdrop for the rest of the embellishments


I firstly designed the main area of my layout with the photo, photo layers and where my fussy cutting as going to go but not attaching it to the background paper. This gave me my design shape to work with for adding my mixed media background on my background paper. 
I used a wide dry paint brush to dry brush/smudge some gesso over the design area.   I then used the Distress grit paste to do my stencilling with. I love this stuff, its so easy to work with, gives a fabulous texture and it dries a lot quicker then normal texture paste.


After attaching the main design (I popped this up on some cardboard or use foam tape/pads) to the dried mixed media background and paper I slotted the doily chipboard into the two corners under the photo mount layers. then I built the rest of the design up on top with the flourish chipboard swirl and the flowers.
I added some gesso splats all over the layout then too.


Lastly I added some Frantage fragments mixed with some pink Art Sugar with some gel medium in a few areas around the layout.


The flowers I used on top and poke underneath my fussy cut layers to help create the depth to the layout. My fussy cut sentiment was inked with the Rose Bud chalk ink pad.


Products used on this layout


*  Kaisercraft: Treasured Moments: Memory (both sides)
* Kaisercraft: Treasured Moments: Wonder
Dusty Attic: Chipboard: Decorative Scroll #1 DA0213
Dusty Attic: Chipboard: Doily #5 DA0763
Wild Orchid Crafts: Flowers: Sweetheart Blossoms Ivory
Wild Orchid Crafts: Flowers: Gypsophila pink & wine
Stampendous: Frantage Fragments: Shabby Pink
Tim Holtz: Distress Grit Paste white
Memory Box Stencil:
Gesso white
Prima Chalk Ink Pad: Rose Bud
Blue fern Studios: Imagine Ink: Embossing Powder: Magenta
Blue Fern Studios: Imagine Ink: Glitter Army Dust
Prima Marketing: Art Ingredients: Art Sugar: Pale Pink


This photo is taken at an angle to show you the layers and how this creates the depth and interest  to the layout.


Thanks for stopping by my blog today and taking a look at my layout!

That's all for now!


Ginny  :)


Sunday, 23 April 2017

More Than Words April challenge

Hello all!

I really enjoyed doing this one!
I've been eyeing this challenge up all month and I've finally got around to doing a layout for it! I loved this colour scheme!

This is my layout for the More Than Words April challenge.


This months brief was colours,  'Black and White plus 1'
and the word was 'Dream'.


So all this is fairly obvious with my layout. I included a pale blush colour in with my black and white which gave my layout a soft pretty look and matched DD's dress. The word Dream can be interpreted several ways to me with this layout, I hope all my daughters dreams come true, I often wonder what it is she dreams about, sometimes she looks in a dream world all of her own! So an apt title - 'Dreams'.


Here are some close up details and product list....


This mixed media layout started with some gesso brushed over my design area on the background paper. I then sponged circles of more gesso around the edge of the brushed gesso with a circular sponge applicator to soften the edge and add detail with the circle shapes.


I used layers of strips of paper cut different sizes and added in different directions over the top of the gesso from the paper collection 'White Truffle' by Hot of the Press. Then I added layers of torn strips of  3 different washi tapes. Over the top of that went the stencilling with distress grit paste and the mini harlequin stencil.


The Dusty Attic chippie word 'Dreams' was simply painted with a couple of coats of gesso.


My embellishments included some leaves and flowers and the circular frames made from Martha Stewart moulds with white paper clay.


The addition of some beautiful Prima flowers, strips of lace, the shabby wood hearts and the seed beads added to the shabby chic, soft romantic feel.


And over the top of all this was a splattering of watered down gesso.
When making a layout like this I do mostly use my hot glue gun to attach the heavier and bulkier embellishments, the seed beads and lace with a gel medium and the papers and photos with double sided tape.


Products used on this layout:

Hot of the Press: White Truffle 12x12 paper pad
Dusty Attic chipboard: Word Pack #4 DA1077z
Live & Love Crafts: Lace and Shabby Wood Hearts
Wild Orchid Flowers: Ivory Sweetheart Blossoms
Selection of 3 Washi Tapes
Gesso / sponge applicator
Mat Gel/ glue gun
Seed Beads
Martha Stewart: Silicone Moulds - Maple Leaf/ Flowers/ Circular frame
Martha Stewart: White paper clay
The Crafters Workshop: Stencil: Mini Harlequin
Prima Marketing: Flowers: Seashore #574949


I hope you like this one as much as I do!
Thank you for stopping by


Have a great day!

Ginny  :)   💕


Sunday, 19 February 2017

More Than Words February Challenge

Hello all,


I have been wanting to get back to doing a few online challenges again for a while and this weekend I had a little free time so I got down to business and here is the first challenge I decided to do!


This layout is for the 'More Than Words' February Challenge.


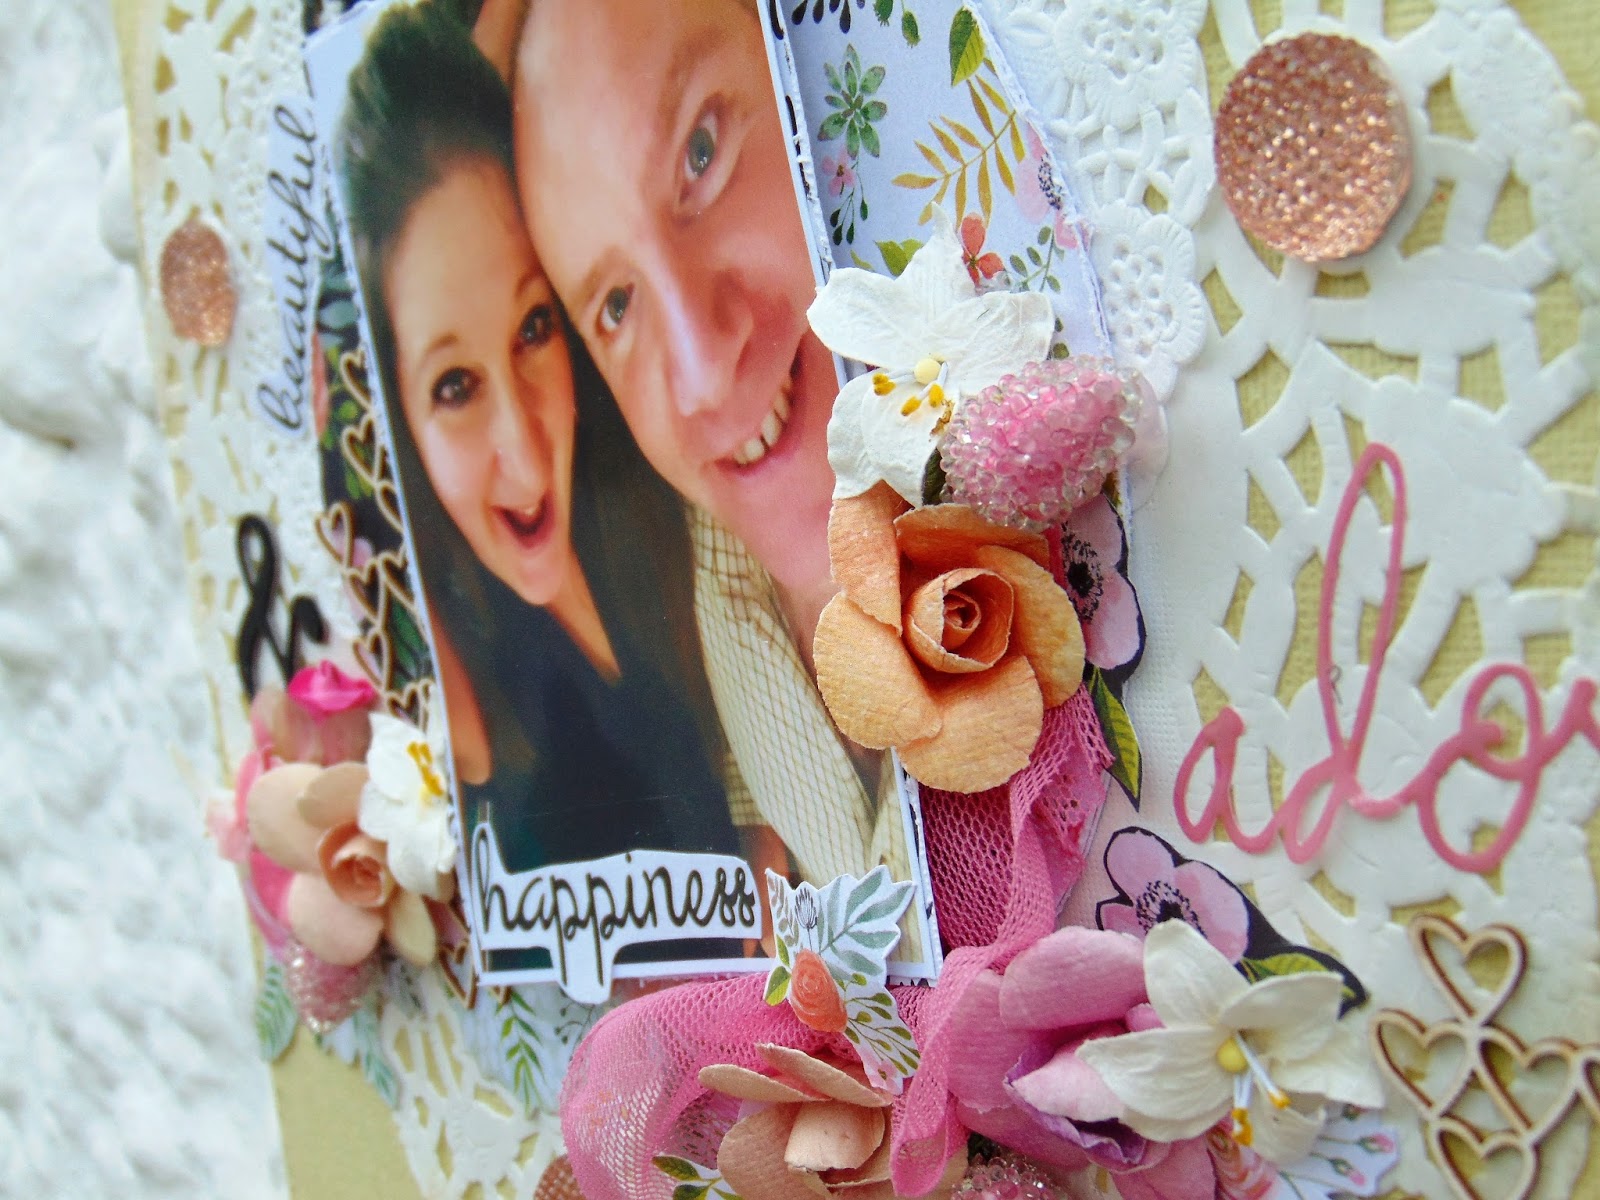
My 'together' is my photo of me and my hubby. We were at a works Christmas party and took this tipsy selfie during the evening. I like this fun photo instead of the usual posed for photos!
I used 3 ampersands!


I teamed my challenge up with a Valentines theme and used Kaisercraft True Love paper collection. The layout is based on a large doily lightly inked round the edge.
I made a circle of 3 of the Kaisercraft papers cut into segments to make thirds for the circle in the middle of the doily.


I fussy cut some floral elements out of the papers to use in my flower cluster.
My flowers are nestled in some pink gauze material.


The Ampersands were from a 'Thickers' set and used to space between my fussy cut words.


I used a range of different flowers and beaded buds and some big bling with the pink dazzlers!


I used some Wycinaka chipboard, this BG Heart piece I cut up into 3 pieces to use around my design.


Products used on this layout


* Kaisercraft: True Love: 6.5" Paper Pad
* Kaisercraft: Cardstock: Aloe 12x12 weave
* Wycinanka: Chipboard  BG Hearts
* Creative Expressions: Dazzlers pink
* Scrapberrys: Stem lily white
* Prima Flowers: Nikko Danno #582081
* Live & Love Crafts: pink beaded Buds
* Heidi Swapp: Sugar Chic: Adore sticker
* Prima Chalk Pad: Dry Sand
* Thickers
* Pink gauze material
* Large Doily
* small doilies


Thank you for stopping by today!

Ginny   :)